Showing posts with label inspiration. Show all posts

March 29, 2011

Creative Block

I've been spending the last few weeks starting to work on the creative for our invitations. Here's where I'm at so far:


Haha :)

The problem that I'm running into right now is the same one I've had all along - I have TOO many ideas! I've really been trying to narrow them down, and I know that I have the right "look" at this point for the wedding overall...but where to go from there? Yes there's inspiration boards, etc etc and I have all of that, but pulling all of those into a piece of paper tends to have its difficulties.

This weekend, my mom and I are going to meet with my aunt to discuss flowers - logistics of getting everything up north and cost to do so, overall look of the flowers (some of this is obviously limited by the transport up north, but I know it's all going to look amazing), and really nailing down the details of the day. I have a feeling that this will be a HUGE help in getting an overall picture of the day, especially because I know my mom and aunt will have a lot of great ideas to get everything executed. I just hope that all of those discussions get the creative juices flowing for me afterward!

February 17, 2011

Adventures in Save the Dates

Last weekend, Allen and I were able to finally finish our first crafty wedding project. Success! While it was definitely nice to see it all come together, there were definitely a few bumps in the road. Since I am not even close to an expert when it comes to all things print and crafty, I am happy to share my mishaps with all of you to avoid in the future.

First - the design. As always, never an easy process for me. I started out sketching, mostly trying to work on the "logo" for our wedding. I wanted to have an image that we could carry through all of the pieces of our wedding (with some variations), and finally came up with something that was both typographically and aesthetically pleasing (to me), with about 4 different designs and layouts. Then, I started working with photos that I thought represented the Traverse City area a bit - I wanted people to look at the save the dates and get excited about the possibility of going up north for the wedding. The final product turned out like this:

(Under the 9.10.11 it says "traverse city, mi" and on the back is the hotel and website information)

My mom had seen the photo on one of the sites I had looked at (I used istockphoto.com for this particular photo) and was immediately on board. Once I showed it to Allen, he was in love and instantly wanted a glass of wine. Success! I decided on the square format based on some free leftover envelopes I had from a job at work, and definitely couldn't throw those babies away! They were a clear vellum so the recipient could see the image through the envelope. Love.

However, the full layout of the card was actually on a 5 x 7" card. I did this because I used a site called Vista Print to print the cards. They're one of my favorite sites to use, especially for down and dirty printing - even though their options for specs can be a bit limiting, the printing always turns out really nicely. So when we got them, they looked like this:

(We need a new camera - sorry for the blurriness)

This meant that Allen quickly became my go-to cutter buddy, and he used my paper cutter to cut them down to size. I had this from previous art projects in school, but you can get them for super cheap at Michael's, and they come with different cutters so you can perf, score, etc.


The next step was inserting into the envelopes (an easy while-watching-Jeopardy activity), and then we affixed the return address labels. I purchased a return address stamp from Paper Source to save on cramping and cheesy return labels. I figured that since we'll be sending out a lot of wedding-related mail in the near future it would be worth it. Top that off with a handy $10-off promotion, and I grabbed this guy for $25 worth of hand cramp savers:

You can change out ink colors, and if we ever move, we can replace the plate with a new address

Then we stamped our return address onto some round sticker labels to use as our sealers (saving precious taste buds and preventing tongue paper cuts - always a plus):

Ta da! Love those envelopes.

The final step was addressing these suckers. This is where we had some problems. Again, I used my trusty Paper Source to find some fancy address labels, and ended up finding vellum labels that would allow for the wine image to be seen through the envelope without a chunky label covering everything up. Amazing! This would have all been great, except that the template that I downloaded from PS was incorrect. Twice. I set up my template in InDesign to allow for use of a scripty font that I had used on the invites. Due to the vellum, it was difficult to see on the actual label sheets where the die cut of the label fell. So it wasn't until we were pulling the labels off to affix to the invites that we actually realized that half the labels on each sheet printed off-center or completely off the label.

Epic fail. This would be where I would show you a picture of this monstrosity, but we were so frustrated in trying to re-work them that I never got around to it. After trying to re-layout the labels for the cut off addresses, and after going through way more labels than we had intended, we ended up getting the save the dates out in two batches - first were the ones that were at least still mailable (even if they were off-center), and the second drop was of all the people from the first batch that their labels didn't really meet my standards. The second batch went out about a week later after procuring more labels. So, if you got your save the date late, that's why! And even the second batch still didn't turn out 100% the way I would have preferred. But, it's done, and lesson learned - measure the template yourself, and get labels with a clear die cut so you can see mistakes right away. Done and done for next time. At least it wasn't for the invitations.

Overall, despite some serious address label frustrations, I am really, really happy with how they turned out. I think they portray the overall tone of the wedding with the bay and the wine (naturally), and I'm proud of the work we put into them together. Hopefully everyone else enjoys them as much as I do!

January 21, 2011

Checking off the To-Do's

My my my, it has been a while.

But can I just tell you - we have been so, SO productive!! Through the holidays, the time off of school (which I'm now back into), and everything in between. Productive, productive, productive.

A few highlights of items checked off the to-do lists:

  • Bridesmaid Dresses - check! Since we have such big bridal parties, I'm letting my lovely ladies pick their own style of dress. They'll all be from the same manufacturer, the same length, and the same color, but the style is all completely their own. I want my ladies not only to be comfortable in their dresses, but if they feel comfortable they will look even more fabulous than they already are. Plus, I love how everyone is going to look unique. Woo!
  • Groomsmen Tuxes - check! We were able to get our account set up with Men's Wearhouse, and all of the men will be looking dapper in their tuxes. The guys have it so easy - they just get measured and it's done.
  • MY Dress - check! Yep, you heard right. I have a dress. But that's all you're going to hear about it ;)
  • Wedding website - check! I was finally able to take some time and update our wedding website with all of the event, travel, and accommodation information for our guests. Hopefully it's helpful for people, but I definitely enjoyed putting it together. Check it out at: www.allenandkaitlyn.com.
  • Registry - check! Well, at least one part of it. We did a partial registry at Bed Bath & Beyond, but will also be hitting up Crate & Barrel in February and possibly Macy's if necessary. At first I wasn't sure how much Allen was going to enjoy registering, but once he got that scanner gun in his hand I think he felt a new sense of power. I think we both got a little scanner-happy at some points (everyone needs a wine refrigerator, right?) so we may be doing some editing once we get our other registries taken care of.
  • Wedding bands - check! A super easy night out resulted in us walking out of the mall in under 45 minutes with our wedding bands. I think we both just went in with clear ideas of what we wanted, and it was just quick as can be. We have them at the house, and it's fun for me to just take a quick peak at them whenever :) So fun.
  • Honeymoon flights - check! We were able to secure our vacation time for the year, and are now booked for our TWO WEEK honeymoon! We'll be flying into Barcelona, spending a few days there, then fly into Rome, spend a few days there, and then spend the second week touring around Italy. I don't remember ever taking a full two week vacation (at least not since I was much younger), so I am really excited for our adventure!
  • Save the Dates - almost check! I've been working on our save the dates for a while now, and after many, many, many drafts, revisions, theme and color changes, format changes, etc. I think we finally got our favorite nailed down. I really, really love them. I'll be sure to post more up once they finally go out, but I'll be releasing the art to the printer this weekend and putting them together in the coming weeks. But MAN! If I was this indecisive and nit-picky over our save the dates, I can't even imagine how I'm going to be on our invites.
It's been really great and a huge relief getting a lot of these items taken care of. I'm so excited to keep getting things checked off!

August 28, 2010

3-Day Recap

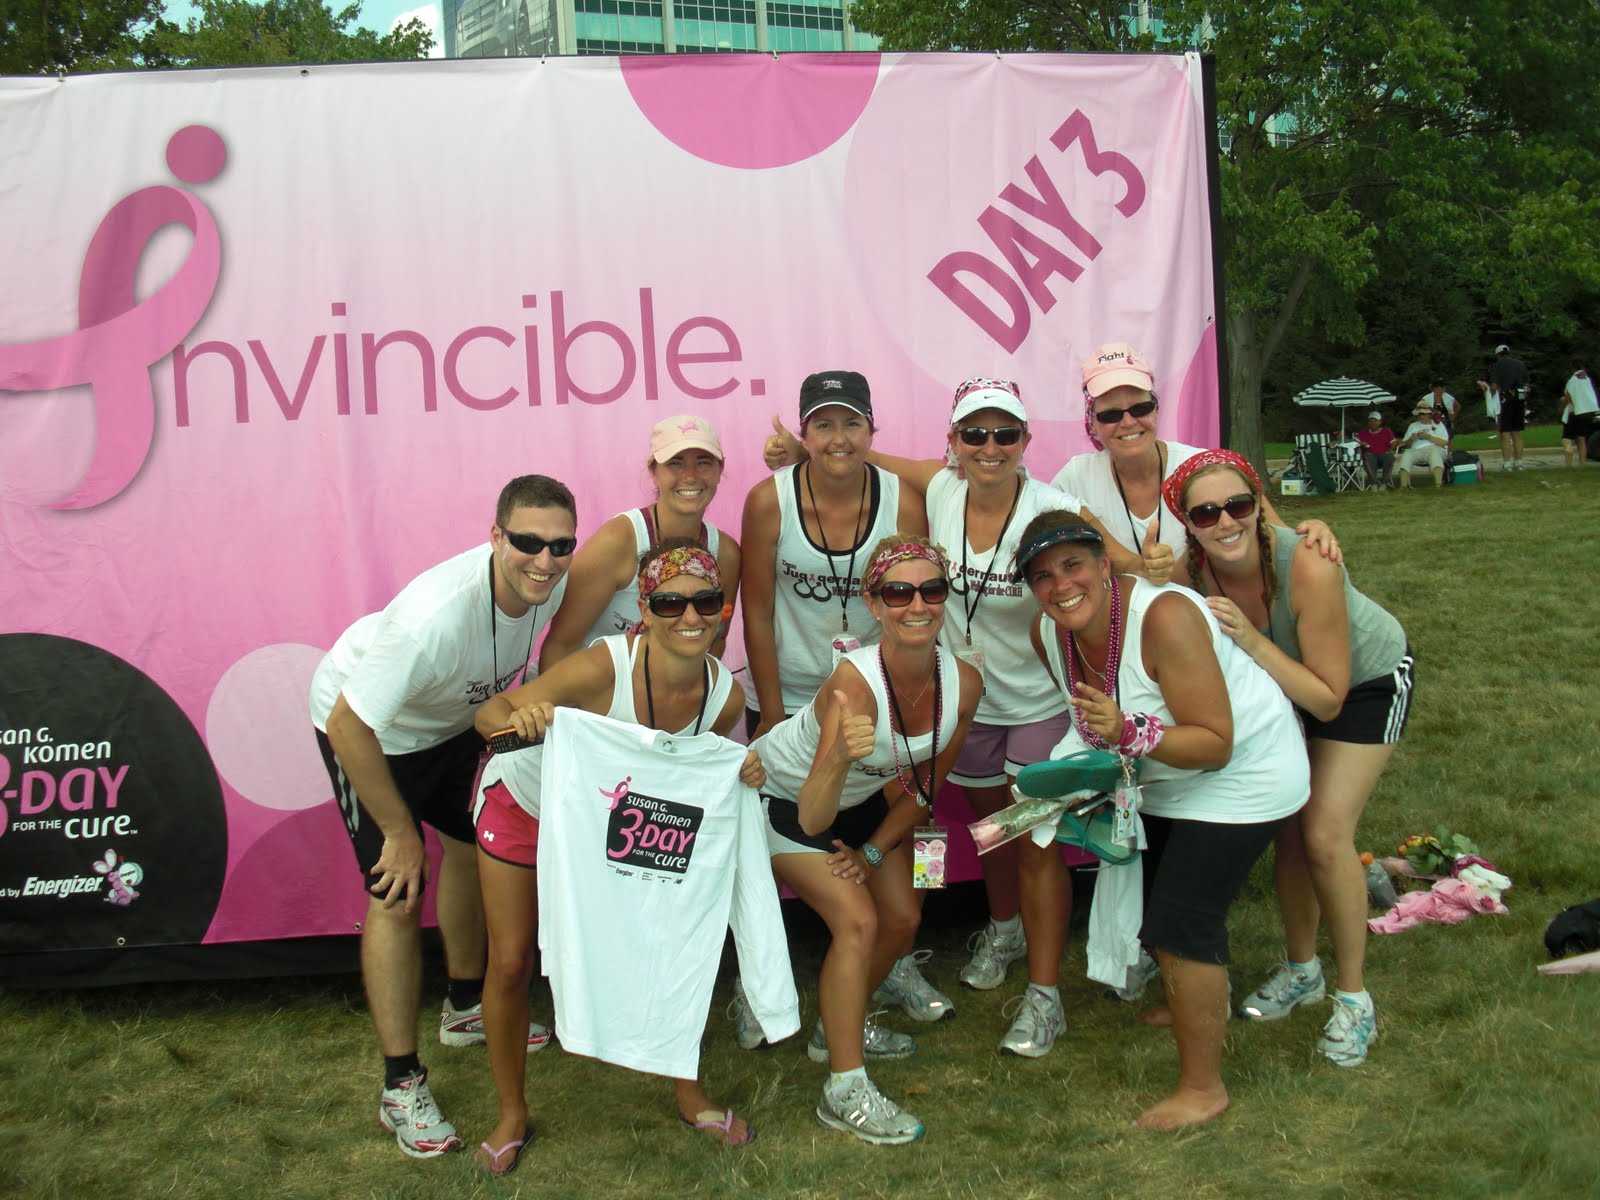
The walk was two weeks ago, but it is still really hard for me to put the entire experience into words. There are a few words that come to mind: Inspiring, motivating, humbling, exciting, emotional, amazing, exhausting...but those don't even seem to do it justice. The people who had done the walk before had told Allen and I that this would be a life-changing experience.

They were right - without any doubt in my mind.

First and foremost, we walked with over 1900 of the most amazing people I think I have met in my life. We were crewed and tended to by over 500 volunteers who came out just to make sure that we, the walkers, were kept comfortable and healthy. I've never seen anything like it! Crew members up at the crack of dawn making us breakfast; medical staff tending to every blister, headache, ache and pain; and a security team made up of big guys on Harley's with pink mohawks and beards.

The one unfortunate piece of all of it was the extent of the blisters that I ended up getting due to the 90 degree heat for three days in a row. My feet are still in recovery! The heat made a lot of things unbearable for a lot of people - the blisters, heat stroke, dehydration, etc. We saw at least 7 ambulances take people away from camp because of how extensive the heat was. Those blisters also prevented me from doing the entire walk - I was only able to do about 45 miles in total. I know, I know, only 45 miles. But when you have a 78 year old man who is doing the walk with you, and beating you into camp every day, you realize exactly how humbling of an experience this is! However, crew members definitely made it a point to remind us that we already did what we came to do - raise the money, and bring awareness to the cause. The walking was just icing on the cake.

Downtown Plymouth - our new favorite city

The best and coolest part of the entire walk was the amount of people in the community that came out to support us. It was as simple as walking by a house on the route that had a sign up saying "Please Run Through Our Sprinklers" (something that was very much appreciated at high noon!).  There were families that sat out in their front yards handing us cups of fruit and bottles of water. It seemed like the entire city of Plymouth came out to celebrate our walking through the downtown area - they had to put barricades up so we actually had room to walk! There was a woman (we called her the dancing lady) that comes out to the walk every year with a giant speaker and an iPod, and she just stands out there every day all day blasting her music for us along the route, dancing and singing. She's a 28-year survivor. And just the amount of people that came out to support us, telling us we're making a difference, holding signs that say "You Hold Our Hopes" - it's hard to hold it together even thinking about it now.

The Dancing Lady! Still there on Day 3

Looking back on the walk, it's hard to pick a moment that is really my favorite. It could be walking through downtown Plymouth, or the rainbow that came up over camp on Saturday night, or maybe all of the walkers raising our shoes to the breast cancer survivors that walked with us. But if I had to pick one, it would be walking into closing ceremony with Allen. Just him and I, walking through the field in front of Ford Headquarters, overhearing on the loudspeaker that we had finished. I wouldn't have made it the entire last day without Allen and his support. We laugh trying to think about it now, but it's hard to look back on the walk and remember every mile - mostly because I think we blocked most of it out! But we do remember snippets, snapshots, and flashing moments that I know will stay with us forever.

Team Juggernauts

Rainbow over camp on Day 2

Raising our shoes to the survivors

Everyone keeps asking us if we're going to walk again next year. I can say with all honesty that we wouldn't be able to walk next year because of the wedding, but we will be out there supporting. This year's Michigan event alone raised over 5.4 million dollars toward breast cancer treatments, research and community outreach programs - but it still isn't enough until there's a cure. So yes, we will be financially supporting, but we will also physically go out and support those that choose to walk again. The people that came out and supported us on the walk are incredibly selfless and amazing, and we would like to give back what was given to us throughout the walk - inspiration.

The love of my life :)

Thanks again to everyone who followed and supported us on this amazing event - you guys are all incredible :)

August 10, 2010

Let the countdown begin


In a little over 60 hours, Allen and I will be starting our journey for the Susan G. Komen 3-Day Walk for the Cure. The 60 mile route starts us at Oakland Community College in Farmington Hills on Friday, has us looping and camping in Livonia for two nights, and ending at Ford Headquarters in Dearborn on Sunday.

Everyone, repeat after me: Please don't rain, please don't rain, please don't rain.

Thank you.

I'll be trying to report in from the walk (at least through Twitter or Facebook) to let everyone know how it's going, but I will for sure be keeping track of the entire experience while we're there, and I can't wait to share it all with you guys.

So far, I can tell you at least this much: This has been quite a commitment - and we haven't even started the walk yet! Ironically enough, that actually feels like the easy part! The fundraising piece of it has definitely been the most exhausting, stressful, and trying piece of this so far. A $4,600 required donation to raise between Allen and I is a lot of money. The rest is just endurance. We're not quite at our goal yet, (and you can still donate at the links above!) but I have hope that we'll get there.

A quick note to those who have supported us so far:
THANK YOU THANK YOU THANK YOU!!!

We know our emails out to everyone have been annoying, along with all of the events, the Facebook alerts, Evites, raffle tickets, everything. But many of you not only supported us emotionally through all of this, you have put in your own time and money, and that has taught Allen and I lot about what great friends and family we have. We are very, very lucky.

If you're here in the metro Detroit area this upcoming weekend, and would like to come see what all of this is about, please click here to get all of the spectator information you need - including cheering areas all throughout the Farmington Hills, Livonia, Plymouth, and Redford areas. Also, from what we understand, the Closing Ceremony is a very cool and emotional experience, and friends and family are also welcome to that. All of the information is in that link.

Everyone I know who has done the walk has said it is an experience that changes your life. I'll have to wait to see that for myself, and I know that we'll have lots of pains and blisters when we get done with this thing, but I also know we'll also have a lot of love to carry us through it. Wish us luck!

August 3, 2010

Introducing Urban Blue

Alright everyone, I'd like to introduce you to our wedding reception site, affectionately called "Urban Blue":

Photo courtesy of Orchestrated Grace

Now it doesn't look like much now, but believe me, it's going to be fabulous. Picture in your mind a crisp white tent spanning the lawn you see above, with tables overlooking the sunset over Grand Traverse Bay (if you're going off of this picture, the beach would be all the way down at the bottom past the picture). Isn't it awesome?! Eeeeeeee! This whole space is like a blank canvas just waiting for us, I am so excited!

There are a ton of perks and great things about this location. One thing I love is the small cottage that you see at the top of the picture. It will be rented to us for the week prior to the wedding, perfect for our early arrival for preparations (but sorry, not open to everyone else!).

And this is probably the best perk ever: Guests can walk (or stumble, if you prefer) out to the beach, walk down the beach to their left, and about a half block later, they arrive at one of the hotels we'll be reserving rooms at! We'll be offering up other hotels to people as well of course, but how could you not take advantage of that?!

So many great were accomplished this weekend - meeting with our tent and equipment rental company, meeting with photographers (nothing decided officially on that yet), meetings at the church, and meetings with hotels in the area. Let the planning begin!

July 19, 2010

Flowers by Gabrielle

As many of you may or may not know, my Aunt Carolyn co-owns a flower shop in Grosse Pointe called Flowers by Gabrielle (Gabby is the other co-owner) and I used to work with them quite a bit back in my college days. They do all kinds of events all over the area, including weddings, Stanley Cup parties (no joke), parties gallore - including kid's birthday parties, and all kinds of other stuff too. I am lucky enough to say that they will also be doing the flowers for Allen's and my wedding on top of all that!

Well, this past weekend, they had a monster of a wedding that they did the flowers for. They just posted the pictures up, and ohmygosh did my jaw hit the floor when I saw the photos. Stunning. Seriously. Here are a few of my favorites (all photos courtesy of Flowers by Gabrielle's Facebook page)

Bridesmaid bouquets - sooo gorgeous! (and huge!)

Tent Entrance

The Head Table - the entire table had mirrors on it so the flowers and candles reflected up (so cool)

Banquet Tables

Closer look at the banquet tables

There are so, so many things that I love about what they did! Of course, when you have the money to do all of this, that makes things easier ;) but I know my aunt and Gabby can make anything look gorgeous because they are so creative and so good at what they do! I know that I am in good hands for sure, and I can't wait to work with them. Love it!

May 12, 2010

Hey Buddy!

Hi everyone, I would like to introduce you to the newest member of my family.

My brand-spankin'-new, 15" MacBook Pro:

Hello, lover.

How did I come across this prized possession? Well, Allen and I went out for an early birthday dinner on Friday out at Partridge Creek. If any of you were in Michigan on Friday, you would remember that there were tornado and storm warnings going on all night, and it basically looked like a monsoon through the restaurant windows. After we finished up at Brio (ps - soooooooo yummy), Allen decided that he wanted to take a walk around the mall to "walk off dinner." I gently (ha) reminded him that it was a disaster outside, so he said we would stop and get an umbrella somewhere. So we walk out, it's only slightly drizzling...and then suddenly pouring all at once. So I gently (ha) again tell him we need to get inside now and we duck into the Apple store that was nearby. I then told him that I didn't think that the Apple store sold umbrellas, and then he suggested that we get my birthday present instead.

So, basically, I felt like a jerk for my ranting about the weather. But I don't think I've complained about anything since! :)

In true form, I moved on to the next important step: Naming the laptop. For those of you who don't know, my friends and I have a tendency to name many of the inanimate objects that we hold near and dear to our hearts. From cars, to computers, to laptops, to even purses or sunglasses, naming provides another level to the said object. With this in mind, I shall call him...Buddy!
Now I realize that this is a really crazy, extravagant gift from basically the best guy in the world (yeah, I said it). I'm a lucky girl, without a doubt, but don't think I didn't call Allen straight crazy for doing this, and that I didn't practically fight him on our walk over to the laptops. Of course, once I realized that he wasn't changing his mind, I easily gave in. He did say that his reasoning for getting me the laptop was three-fold: 1) My grad school classes are becoming increasingly Mac-driven, and it would be really helpful for my coursework and projects to have a computer that is compatible. 2) I'll be designing a lot of stuff in the near future, and Macs are obviously very design-friendly, so this will just make life a little easier. 3) He knew I really wanted it :)

Now I'm excited to dive into all of the capabilities of the laptop, utilize all of the tools, tutorials, videos, and tips that my fellow Mac-crazy comrades will share with me, and start some new projects!! More to come on that end!

April 5, 2010

Arc of Inspiration - Phase 1

I was reading through one of my favorite blogs on the Momental Designs site, and one of their entries really interested me. She talked about an idea called her Arc of Inspiration and how surrounding yourself with images that inspire you can help naturally breed creativity. A lot of this falls in line with what I know a lot of people have been doing lately (mostly for wedding planning, but for other things too) in creating their own Inspiration Boards to drive the elements for their wedding, event, or just for breeding their creativity.

One of the things that Kristy brought up in her blog about her Arc of Inspiration was that it was a way for her to continually update and fester her creative spirit. Both at home and at work. Since I spend the majority of my time at work (and in a cube), I realized that my work area didn't really inspire a whole lot of creative energy. I've started working on this for a couple of reasons: 1) It would be nice to look at something prettier than cube walls, 2) my work space needs a little face lift and 3) I need some other pieces of inspiration at work.

I've already started Phase 1 of this process by re-arranging a little bit - I moved where my monitor is (from the middle of the desk to the corner) moved my computer tower to the floor for more desk space, added new bulletin space for me to pin up fun and inspiring things I find, and rearranged some of the stuff that was already on my cube walls. You can see (at the right) my first piece of inspiration: a Dove chocolate wrapper my dad gave me forever ago when I first started working here that says "Find your passion." It's been up in my cube forever, so that's for sure staying. You can also see my colorful tea tins, there's a pic of Allen (always inspiring :) ), and the rest is kind of a blank canvas! Kind of exciting! I'll post more as it evolves.

March 26, 2010

Momental Designs

Happy Friday! (oh, and GO STATE!) :)

So in my search for inspiration lately, I came across a website that I absolutely, 100%, head-over-heals fell in love with: Momental Designs. The invitiations that these ladies come up with are so unique, fresh, completely girly, and just absolutely stunning! I am constantly going through their catalog online and patiently waiting every day for another blog post to come through to see what else they've been working on. Their unique style of hand-painted invitations combined with different printing processes (including letterpess!) are just incredible! I love, love, love them. Ok enough of that, here are a couple of my favs:


I think this last one has to be one of my favs. As much as I love the letterpress save the date (the middle one), I really love the hand painted flowers in this one. How gorgeous, right?! Love. Please, please check out their blog, Rice Ink, to check out more.

March 23, 2010

Adventures in Embossing

I've decided to start being a little crafty in sprucing up the paper products for our wedding. I've been looking into a few different options, and one that actually seems do-able on my end would be to do my own embossing. I know a lot of people who have done this and it has gone very well! So I have started on my own little embossing adventure and the results were great!

By the way - there are two types of embossing I'm looking at. One is blind embossing, where the image is raised on the sheet of paper but no ink is used (like a notary stamp). The other is heated stamp embossing where you stamp an image in ink, and use embossing powder and a heat gun to get a raised image on the paper - that's the one shown below.

Step 1: The Materials
I went and bought a Martha Stewart starter embossing kit (it was roughly $20 at Michael's without coupons, but since I'm all about the coupons, that definitely helped out!). It included embossing powders, an ink pad, stamps, and a stamping block. I then bought the heat gun and had some leftover cardstock at home that I used to stamp on.


Step 2: Stamping and Powdering
After I had all my materials ready to go, I took one of the stamps, affixed it to the stamping block (for this kit, the stamp just clings to the stamping block, but I've read up on other kits where you have to tape or glue them on - the cling stamp is much cleaner to work with in my opinion). I stamped it in the ink pad, stamped that on my paper, and then covered the clear stamp image with a ton of embossing powder (shown here).


Step 3: Tapping and Heating
I then picked up my piece of cardstock and tapped off all of the excess powder, revealing the image that I stamped down (shown here). I took the excess powder that I stamped off and put it back in it's original container, since it can be used again. After this, I took my heat gun and positioned it over the stamped image until you could visibly see the image gloss over. Note: I had originally tried this once with a blowdryer instead of one of the heat guns you could buy at the store (since I'm cheap and thought I could do the shortcut). It doesn't work, I promise. I held the blowdryer over the image for a good five minutes and nothing happened (and maybe that was just my crappy blowdryer). As soon as I sucked it up and bought the heat gun, the image embossed almost instantly - it's totally worth the investment if you're going to do this.

The Final Product
(sorry for the crappy camera work)

What you can't see from the photo is that the flower is glossy and the gold part actually raises up from the paper. It's a really cool finish, so I think this is the route I might go! I think Allen was pretty impressed with my craftiness, but is also slightly concerned about what this will do to our house - and possibly our kitchen table. I promise I will find a better work space for when this rolls out for the real deal. :)

I highly recommend this because it's so freaking easy, and will help anyone out that needs it for their own wedding! The catch is you have to find a stamp (or stamps in my case) that you love and want to incorporate on all of your materials. Another option is to make your own stamp, but we're going to see how the stamp hunt goes first.

March 22, 2010

Pretty Things Part 2

In continuing with posting up a bunch of pretty things I am loving on right now, we move to the invites (WOO!) which are a big part of what I've been researching lately. As many of you may know, I love all things letterpress, so I have been researching a bunch of vendors to possibly do this for the invites at least. The problem with letterpress (the only problem in my mind) is that it is very expensive to do, and I definitely don't want to risk trying to print them that way myself. One task I have been looking into is doing my own embossing, which could save me a little bit of money, and also does not take too long to do. I recently bought a test kit for this, and I'll post up my findings as soon as I go through my first test :)

Ok enough of that, onto the pretty stuff!

Today's Post: Pretty Invites I Love :)


Golf theme? Classic ;) *especially for a Mulligan*

I am all about the color (oh, the color) on this one, as well as the use of letterpress with the reverse printing.
Love how the design lines up on the insert cards, as well as the reverse reverse print on the invite (plus, that color is gorgeous!)

HOW CUTE IS THIS?! I love the vintage feel with these invites.
The Save the Date (the tag) is so cute - plus the pocket carrier for the invite and inserts.

 I really enjoy the detail in this one - I (unfortunately) didn't take down the whole suite that went with this one, but I do remember the design carrying through on all of the printed pieces, and it was really well done.

 Love the simple, but unique, layout on this one.

All fun things for a Monday morning! Enjoy! :)


Remember, if you get a chance, please help donate to Allen and I for the Susan G. Komen 3-day walk! Links to our pages are in the upper-right of the blog. Thanks so much!

February 15, 2010

Save the Dates

So, I may have spoken too soon in my post last week that I'm lacking wedding "style." All of a sudden, out of no where, all kinds of wedding fabulousness is smacking me in the face. I'll continue to post a lot of it up here as part of my own categorization method, but I've decided to also keep a few details to myself so I can make sure there's still surprises for those who actually come to enjoy our day. :)

In the meantime, I wanted to share these adorable letterpress Save the Dates that were posted as part of Clover and Bee's "Inspired Midwest Bride" series. I just love how intricate the design is, while completely taking advantage of the one color letterpress print. The entire Save the Date package that they put together is adorable - a vintage feel, but still crisp and clean, along with the long portrait composition. The calendar at the bottom with the punched out dates is absolutely adorable too! Plus, I love me some letterpress so I can just never get enough. Enjoy!

February 10, 2010

Lack of Style Guide

A lot of people have been asking me lately about the "style" of our wedding - colors, flowers, centerpieces, look and feel, overall atmostphere (do we want it to be vintage? classic? elegant? contemporary? modern?). Do I have inspiration boards made up? No. Should I? Maybe?

The answer is this: I have no clue.

I can tell you what I think our colors are going to be, and what I think I like for certain elements (flowers and the like), and I can tell you that narrowing down all the beautiful options I've seen on every other wedding blog is incredibly overwhelming, but other than that I'm a little bit lost right now. There are so many options!!!! It's so hard to pin point - especially when we barely have our venue determined at this point. (Sidenote: We should hopefully have that determined after next weekend, when Allen, my parents and I all go up north to finally pick where the reception will be - yay! More on that later hopefully). I have a feeling that the venue will really drive a lot of what our overall style is going to look like.

But the other issue is that I would like for things to be uniquely us, but it seems that everything that is "uniquely us" in the random sporadic ideas that I have tend to not be that original. As soon as I find something I really like and think is cool and different, I read a blog about someone who has done that already. In all honesty, I think we're all just copycats at some point or another, but it would be nice to have a piece of the wedding that just belongs to us and no one else. I hope in the next year or so we'll figure out what that one thing is.

Speaking of blogs, one of my favorites (Clover & Bee) had a quote from one of their featured brides in their Real Wedding section that really hit home for me:

“The truth is, we’re not people who often consider our style. Our most consistent style is probably cute and nerdy, with aspirations to being elegant and sophisticated. (We’re perfectly happy with the former, and occasionally achieve the latter.) That said, we did want this once-in-a-lifetime event to include certain elements—lots of natural light, elements of both the outdoors and the city, and the beautiful jewel tones found abundantly in our culture. Most of all, we wanted our wedding to look and feel unique, rather than just being another event in a rectangular box in a hotel that could be located anywhere.” 

January 29, 2010

Winter Wedding Inspirations

I saw these on ruffledblog.com, and even though I'm going to a winter wedding this weekend (more on that tomorrow), I am not personally having a winter wedding. But if I were, I would want to use each and every one of these inspirations. HOW CUTE ARE THOSE FLOWERS?! I love it! The decor for the cake and everything is so simple and elegant, yet so easy!! To view the entire blog post go here. Gorgeous :)

January 21, 2010

Adorable flowers

Just a quickie for an adorable little flower arrangement I saw on Clover & Bee:

I absolutely love the urns with the roses and how they compliment the tables. As much as I love tall centerpieces, I don't love when I can't see across the table at the people I'm sitting with. I think these are the perfect compliment for classy, a little vintage, yet absolutely gorgeous. I would probably look for something similar to this, but maybe have a grouping of them with different urns and/or different flowers in multiples on tables. That would also depend on how our tables are set up, but at a minimum I think these would look great at a head table or something.

Love, love, LOVE! The whole wedding that these were featured from can be found here, and the photos of the event are awesome. A little too vintage for my style, but still adorable all the way :)

January 8, 2010

Woah gorgeous

2 posts in one day?! Are you kidding me?!

Ok I couldn't help it though - I was browsing and found these photos of gorgeous bouquets from Karen Tran Florals. I love the bride and bridesmaid bouquets! The centerpieces aren't too shabby either, but definitely out of my price range ;) Had to share. Love.


PS - so you are aware, this blog is also for me to categorize things I like for my wedding. Since it's so far out, I'm sure I'll forget all of this at some point, so I'd like to be able to come back here and be like "wait, where were those bouquets I like?" and easily access them. Woo!